Step 1
Start the process by disconnecting the laptop from power supply, unlock
the battery and slide it out from the laptop. Remove all the screws at
the bottom of the laptop.
Step 2
Remove the screws securing the hard drive and hard drive holder, pull the hard drive holder and disconnect it from the motherboard. Then remove the hard drive out from the holder.
Step 3
Remove all the screws securing the CPU heat sink to the motherboard. After that carefully lift the CPU heat sink out from the laptop.
Step 4
Remove the screws holding the DVD drive. Push the DVD drive out from the
laptop with a screwdriver and slide the DVD drive out of the laptop base.
Step 5
Press on the latches securing the keyboard with a sharp object, pull the latch away from the laptop and release
the keyboard, lift the keyboard up and place it upside down on the palm rest.
Step 6
Before you pull the keyboard cable from the connector on the motherboard, you will have to open up the connector. Unlock the cable by moving the connector lock ,
after the connector is unlocked you can pull the cable. Be very careful
with the connector, if you accidentally damage the connector, you will
have to replace the motherboard. Unlock the keyboard cable connector on the motherboard, pull the keyboard cable from the connector and remove the keyboard.
Step 7
The wireless card has two antenna wires connected to it. To
disconnect the antenna wires from the wireless card, hold the
connector with your fingers and unhook it from the card. The wireless card will pop up at an angle of about 35 degrees. Pull out the wireless card from the slot by holding the edges.
Step 8
Remove the screws securing the dial-up modem card to the motherboard. Lift the modem card from the motherboard and unplug the cable from the modem. The
connector is located under the modem, remove the modem and disconnect the cable.
Step 9
Step 9
To remove both memory modules, carefully release the latches on both sides of the memory slot with your fingers, the memory module will pop up at an angle of about 35 degrees, carefully
pull the memory module out from the slot by holding the edges. Repeat
the same process for the second memory module, if they are two.
Step 10
Disconnect the right and left speaker cables on the motherboard. Disconnect the LCD video cable on the motherboard.
STEP 11
Now you can start removing the LCD screen. For a step by step guide on how to remove LCD screen, click here
Step 12
Carefully release the LCD panel cables and remove the LCD panel.
Step 13
Now with the LCD screen removed from the laptop, proceed to Remove the two plastic LCD hinge covers.
Step 14
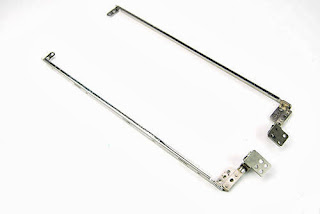
Assuming the two laptop hinges (left and right) are broken, you are going to remove them one after the other.
Step 15
Start by removing the two screws securing the laptop hinges to the LCD cover, in some laptops the top screw might be hidden under a seal on the side of the LCD assembly.
Step 15
Start by removing the two screws securing the laptop hinges to the LCD cover, in some laptops the top screw might be hidden under a seal on the side of the LCD assembly.
Step 16
After the screws holding the hinges have been removed, now remove the broken hinges.
Step 17
Replace the broken hinges with new ones, follow the same process above to install the new hinges and you are done.

No comments:
Post a Comment