For a tech savvy individual, you already know that hard drive failures are inevitable. Possibilities are that sooner or later it will happen to you or to someone you know. The good news is that there are lots of great recovery tools and methods that can be used to recover your lost data.
Connect the Drive to Another Computer
To start work on the crashed hard drive, remove it from the current laptop or computer and connect it to another laptop or computer as a secondary drive. The best way to do this is to use a USB to IDE/SATA adapter, but If you don’t have one available then you can connect the drive to another laptop or computer internally as a secondary drive. If you decide to use this option, please ensure that the machine detects the drive in the BIOS or you won’t be able to access it once the laptop or computer starts up.
Try Copying the Data to Another Drive
After you might have succeed in connecting the drive to another laptop or computer either internally or with a USB adapter, check to see if you can browse the contents of the hard drive. If you can, try copying the data that you would like to recover from the crashed laptop or computer. There is a huge chance or possibility that only the operating system is corrupt and the user data is still OK.
Blue Screen Of Death Fix
Blue screen of death fix, the Blue Screen of Death also known as a Stop Error, Blue Screen, Blue Screen of Doom, BSOD, Bug Check Screen or Stop Screen is an error screen displayed by an operating system after a crash. There is a great possibility that you will have heard of or seen the Blue Screen of Death.
It turns the computer or laptop screen completely blue with an error code. A Blue Screen of Death is the worst type of error a computer or laptop can
experience, unlike other crashes like an application crash, which doesn’t bring down or completely affect the
whole system. A Blue Screen of Death is the result of low-level software crashing or
a faulty hardware and it affects the whole system.
How To Insert And Remove A PC Card (PCMCIA)
How to insert and remove a PC Card, a PC Card is credit card sized device that can be used for quite a variety of
functions, which includes a flash memory card, network card, modem or hard
drive. It comes in different types and they are further explained below
- Type I - Primarily used for adding or increasing the RAM of a laptop PC.
- Type II - Similar to Type I card; it has a 16-bit or 32-it interface, using two rows of pins.
- Type III - Uses four rows of pins with a 10.5 mm thickness, allowing the accommodation of larger connectors for peripherals. Since the removal of legacy ports from most modern laptops, type III ports are typically no longer used.
How To Extend The Life Span Of A Laptop LCD Display
How to extend the lifespan of a laptop LCD display, the laptop LCD screen is one of the most delicate part of a laptop, hence there is need to handle it in such a way that will enhance its efficiency and at the same time extend its lifespan.
The backlight is the light source of a laptop LCD display and without it, images
on the LCD display can not be seen. Therefore, the life span of the backlight is one of the factors that determines the life span of a laptop LCD display. When the backlight goes bad, the laptop becomes useless, until the backlight is replaced by a functional one. Aside the backlight, there are some other things or factors that could shorten the life span a laptop LCD display and i have listed below ways through which you can overcome those factors and extend the life span of your laptop LCD display.
- Set the display brightness to the lowest comfortable level
- Avoid using a screen saver or any software that prevents the laptop from changing to Display-off or Standby mode after a timeout period. If you use a screen saver, enable the option to shut off the display after a time delay.
How To Lock The Hard Drive
The laptop enables you to lock its internal hard drive to help keep your information secure. When you enable the hard drive lock, the current BIOS user password (or administrator password if that is the only password
set) is encoded on the hard drive. If you move the hard drive to another laptop, you cannot access the drive until you set the user (or administrator) password to match the drive password. After you match the drive password, you can change the laptop (and drive) password. If you forget the password, you cannot recover your data.
- Select Start > Turn Off Computer > Restart.
- When the logo screen appears, press F2 to enter the BIOS Setup utility, for a step by step guide on how to run the BIOS setup utility click here.
- From the Security menu, enable Password Required to Boot.
- From the Security menu, enable Internal hard drive lock.
- Press F10 to save and exit BIOS Setup.
How To Set Up Password Protection On Your Laptop
You can protect your laptop from being accessed by another
user when you set up password protection, which is available either
through Windows and through the BIOS Setup utility. For complete protection, it is advisable that you set
passwords in Windows as well as through BIOS Setup. To cancel password
protection, set an empty password.
To Setup Password through Windows
- Select Start > Control Panel > User Accounts, then select your account.
- Select Create a Password, then set the password.
- Select Start > Control Panel > Performance and Maintenance > Power Options.
How To Run The BIOS Setup Utility
How to run the BIOS setup utility, The
BIOS (basic input and output system) Setup utility enables you
to make changes to the laptop system configuration, and to streamline the operation of your laptop to your individual work needs. The
settings made in BIOS Setup generally control the laptop hardware,
and also greatly affect how the laptop operates. To enter the BIOS setup utility, follow these steps.
- Select Start > Turn Off Computer > Restart.
- When the logo screen appears, press F2 (on some laptop model it might be different) to enter BIOS Setup.
- The pointing devices are not active in BIOS Setup, so you will need to use the keyboard to navigate
- Press the left and right arrow keys to move among menus
How To Use A Laptop Touchpad
How to use a laptop touchpad, a laptop touchpad is an alternative to a regular computer mouse, a touchpad allows you to
move the onscreen cursor, scroll through pages or click links on a laptop. It can perform
the same function that a regular computer mouse is capable of, below are tips
on how to efficiently and effectively use a laptop touchpad.
- The first step is to check if your touchpad is turned on, if it is not turned on, follow the steps below to enable it or get it turned on.
Go to Control Panel > Mouse > Settings
Click Enable
Spilled Water On Laptop, How To Clean It
Spilled water on laptop, how to clean it, when you spill water or a liquid on your laptop, the first step is to stop using the laptop immediately. Turn off the laptop, unplug the power adapter
and remove the battery. The laptop should be disassembled as soon as
possible and all internal parts should be inspected for liquid damage. Water or liquid spills on laptop can be very devastating and is capable of causing extensive damage to the laptop. For a step by step guide on how to take apart or disassemble a laptop click here. Take the following steps to solve the problem.
Step 1
Now remove the keyboard and take a
closer look underneath it and search for water or liquid spills.
Step 2
Also check the motherboard for water or liquid spills.
How To Clean A Laptop Screen
Laptop screen is arguably one of the most delicate part of the laptop, personally when it comes to cleaning a laptop screen I do not recommend using abrasive cleaners on the screen display because they can damage the LCD screen, the screen has a very delicate surface.To clean your laptop screen, follow this simple process.
- Start the process by disconnecting the laptop from power supply, unlock the battery and slide it out from the laptop
- Get a soft and clean cloth, use it to wipe dust off the screen
- Dampen the cloth with water
- Do not use an excessively wet cloth
- Then gently wipe the LCD screen display with the wet cloth
- Search and wipe away the fingerprint smudges that may have been imprinted on the screen. Wipe the edges and corners where dust and dirt may be lodged.
- Be very careful, so that you don't drip water on the keyboard as you wipe the screen
- Use a dry cloth, and dry the screen. Wipe away any moisture that may have been left by the solution.
- After wiping the screen, allow it to dry completely
- When you have confirmed it to be dry, then the process is complete
How To Replace A Broken Laptop Hinges
Step 1
Start the process by disconnecting the laptop from power supply, unlock
the battery and slide it out from the laptop. Remove all the screws at
the bottom of the laptop.
Step 2
Remove the screws securing the hard drive and hard drive holder, pull the hard drive holder and disconnect it from the motherboard. Then remove the hard drive out from the holder.
Step 3
Remove all the screws securing the CPU heat sink to the motherboard. After that carefully lift the CPU heat sink out from the laptop.
Step 4
Remove the screws holding the DVD drive. Push the DVD drive out from the
laptop with a screwdriver and slide the DVD drive out of the laptop base.
Step 5
Press on the latches securing the keyboard with a sharp object, pull the latch away from the laptop and release
the keyboard, lift the keyboard up and place it upside down on the palm rest.
How To Replace A Hard Drive Holder (Caddy)
How to replace a hard drive holder, If you bought a new hard drive and you want to install it but the new hard drive does not have a holder, you can easily remove the holder parts from the old or faulty hard drive you intend to replace. You will need a small Phillips screwdriver for this procedure. For how to replace a hard drive holder, follow these steps.
- Unplug the AC adapter, if the laptop is connected to power supply.
- Turn the laptop and remove the battery pack.
- Remove the screws securing the hard drive holder to the laptop
How To Replace A Hard Drive
How to replace a hard drive, you will need a small Phillips screwdriver for this procedure. A hard drive is a data storage device used for storing and retrieving information digitally, it makes use of rapidly rotating disks called platters, which are coated with magnetic material. A hard drive is able to retain its data even when it is powered off. To replace a faulty hard drive, follow these steps.
- Unplug the AC adapter, if the laptop is connected to power supply.
- Turn the laptop and remove the battery pack.
My Laptop Screen Is Black
To troubleshoot effectively, you
need to open the laptop screen, before doing this please check here for instructions
on how to replace an LCD screen. During dis-assembly of the screen, take
note of the points where each screw is before it was removed, so that you won’t
have problem assembling the laptop screen back.
Possible Faults
- Burnt or dead backlight tube
- Faulty LCD inverter
- The laptop motherboard does not supply the LCD inverter with the 5V needed to power the screen backlight
- The laptop LCD lid close switch is stuck in the close position
My Laptop Screen Is White
My laptop screen is white, experience overtime has shown that the cause can
be conveniently narrowed down to three and by following simple troubleshooting
techniques we can zero down on the actual cause of the fault. So when your
screen starts behaving funny don’t write off the laptop yet or rush into
conclusion that you need to buy a new screen.
The truth is when the screen of a laptop develops a fault, most people feel
it is something that they can’t handle on their own, hence they go looking for
an engineer down the road to help them fix the laptop back, but fixing a laptop
screen may not be as complicated as you are meant to believe by the engineer,
it is something that you can do very much handle on your own.
Possible Faults
- Loose connection between the video cable and the LCD screen or a bad video cable
- Faulty or bad LCD screen
- Faulty or bad VGA card
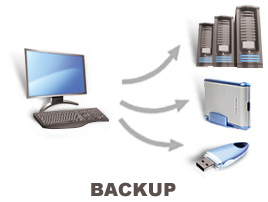
How To Back Up Your Computer Files And Data
There are different ways through which you can back up your
computer data and they all have their advantages and disadvantages. The safest
ways to back up your data are through hard drives, DVD or flash drives and
cloud storage.
1. Back Up Using Hard Drives
There are different shapes and sizes of external USB hard
drives available in the market, some of them require power source from the
mains while most take power from the USB port. Using hard drive to back up data
is the easiest and cheapest method of backing up data. All you have to do is
just copy and paste your data from the internal hard drive inside the laptop to
the external hard drive connected to the laptop through the USB port.
Using hard drive to back up data is not 100% fool proof, it
is still vulnerable to theft, damage and data corruption. Apart from the copy
and paste method of backing up data to hard drives, the more efficient method
is to make use of Windows inbuilt back up utility. To use this, just press the
Windows key on your keyboard and type back up, if you are using Windows 7,
click click the Back up and Restore link that appears.
Laptop is Frozen, Keyboard And Mouse Not Responding
1. Restart your
laptop or computer by forcing a shut down
You can force a shut down by holding the power button until
the laptop turns off, if this does not work, then force a complete shut down by
following the steps below.
- Disconnect the power cord
- Remove the battery from the laptop
- Wait for some time (20 seconds)
- Replace the battery into the laptop
- Reconnect the laptop power cord
- Turn the laptop on
How To Replace A Laptop Keyboard
These instructions will help you to remove and replace faulty keyboards on various laptops, but if your keyboard is missing just a key, it’s not necessary to replace the whole keyboard. What you have to do, is to look for the specific key that is missing and replace it on the keyboard. Follow these steps only if you want to completely replace your faulty laptop keyboard with a new one.
Step 1
Begin
the process of removing the faulty laptop keyboard by inserting a small Flathead screwdriver under the keyboard bezel and carefully lift it up, then
use your fingers to continue releasing the plastic latches, until the keyboard
bezel is completely removed from the laptop.When doing this you have to be
careful because on some models the keyboard bezel might be connected to the
motherboard, so if you accidentally pull the cable connecting the bezel to the
motherboard, please connect it back. In this case it is not necessary to
disconnect the keyboard bezel from the motherboard in order to remove and
replace the keyboard. What you have to do is just put the keyboard bezel aside
so that you can access the keyboard screws.
How To Fix A Loose DC Power Jack
To begin the process, you have to disassemble your laptop and remove the motherboard in order to have access to the power jack, for a step by step instruction on how to remove a motherboard click here. The main fault of the laptop is that the DC power jack terminals is not making proper contact with the motherboard and as a result power supply to the laptop is cut-off. The three basic steps involved in troubleshooting this fault are as follows
- Desolder the DC power jack from the motherboard
- Clean contacts points on both power jack and motherboard with a brush and alcohol
- Solder the power jack back to the motherboard
Start desoldering process by adding some new and fresh solder to all three contact points of the power jack on the motherboard, this will make the old solder easier to remove. After the addition of fresh solder to the contact points, begin the removal of solder on each contact point by heating the point with soldering iron and using the soldering pump to extract the solder. Repeat the same process for all the power jack contact points until you have removed as much solder as possible from each point.
How To Take Apart A Laptop
How to take apart a laptop, circumstances might demand that you open up your laptop to carry out some repairs. It is
possible that you spilled something on it and you want to dry it or it
may not be functioning properly and you want to take a look. Whatever
the reason may be, this is a simple guide on how to completely take apart your laptop.
Step 1
Start the process by disconnecting the laptop from power supply, unlock the battery and slide it out from the laptop. Remove all the screws at the bottom of the laptop.
Step 2
Remove the four screws securing the hard drive, pull the hard drive and disconnect it from the motherboard.
Subscribe to:
Posts (Atom)